CLICK HERE FOR FREE BLOGGER TEMPLATES, LINK BUTTONS AND MORE! »
Showing posts with label Tim Holtz. Show all posts

Tuesday, November 23, 2010

Vintage Card Making Class

On Sunday, I took a vintage card making class at Archiver's.  It was the first card making/scrapbooking class I've ever taken and it was a TON of fun!  I loved getting to sit around and create with other card makers...I will definetly be signing up for more classes.  Anyways, check out what I made!


We used tons of Tim Holtz products and did soo much distressing!  I hard card flakes all over myself!  Be sure to follow my blog (click the button on the left!)

Tuesday, November 16, 2010

Archiver's Make and Take

A couple of weeks ago Archiver's was doing a make and take weekend.  I went one Friday after school and made this card and acrylic ornament.  You were supposed to be able to decorate a clear paint can, but they stopped doing that by the time I got there (very sad). 
The tree is actually embossed with green embossing powder.  I also got to use Tim Holtz's distresser which was really fun and I love the way it made the lighter card stock look!  I used the tiny attacher to make the ribbon look like this (but I ran out of ribbon!)

I've never worked with acrylic but it was really fun!  I used white paint dabbers on the back, embossed the acrylic with a stizzx embossing file, and got to use a corner chomper for the first time. 
I am going to try to decorate the clear paint cans by myself and see how it turns out.  It would be perfect to put some cookies or something in to give to my custodian, the secretaries, principle, vp, and other 2nd grade teachers for Christmas gifts.  Although, I won't be shopping at Archiver's again because their stuff was way over priced.  I will just be using them to take some classes (I am doing a vintage card making workshop and a home decor workshop- both of them are going to be really cool!)

Experiment with Perfect Pearls, Tim Holtz

I made this card about a month or so but never got around to posting it.  When I was finished with the mat (where all the images are), I accidently dipped it in water when I was apply the adhesive to the back.  It smeared the lion image which was unfortunate.  The card also did not glue together very well (as you can see from all the wrinkles-maybe it wasn't completely dry).  But, I decided to post it anyways, I am sure the next time I try this method it will be better.  It's pretty cool because the lion looks different depending on how you move the card.


Tuesday, November 2, 2010

Halloween Party Decorations and Prizes

For our Halloween party we made everyone dress up and we picked out who had the best couples costumes, scariest costume, and funniest costume.  It is too bad that I did not take pictures of the winners, but these are the awards that I made for them. 


I used Tim Holtz distress ink, Tim Holtz stamps from Stamper Annoynous, ribbon from the collection, I cut the coffins out from Happy Hauntings (cut at 10"), and used the Martha Stewart Drippy Goo Punch.


I made these adorable coffins, again from Happy Hauntings (cut at 11 1/2 ").  I used Tim Holtz crackle paint to try to make them look older...


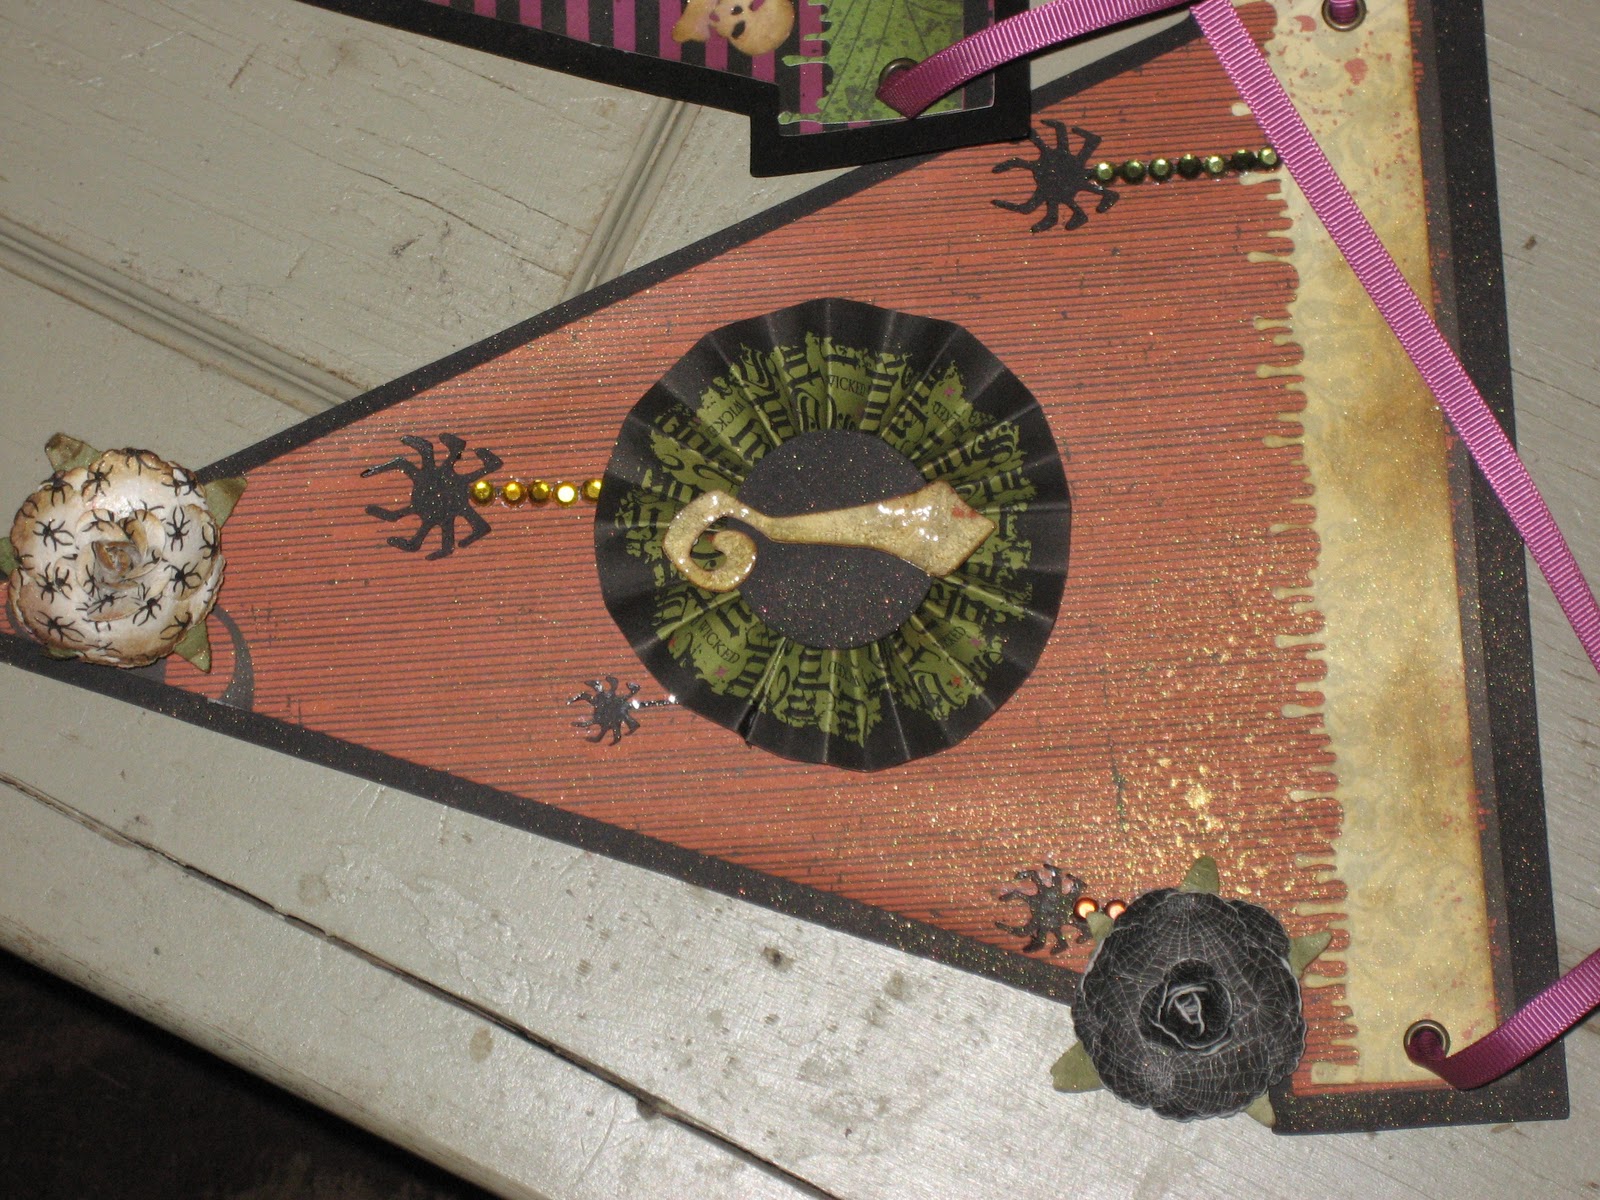
I also made a banner to hang in the kitchen.  It took A LOT longer than I thought it would to make this, but, I'm happy with how it turned out.  I used the Happy Hauntings, October 31st, and the Serenade Cartridges.  It spells out BOO!


 There was a wide range of products used on all of these pendants.  Let me know if you are interested in any of them and I'll tell you what I used.  I don't want to make this post any longer. Except to show you this......

Mel was a werewolf for Halloween and when I saw her I literally gagged!!  haha  The contacts were just so gross!!  The nails did not stay on very long either.

And of course... THE DOGS!!!  I was going to be a vampire from Fangtasia (the vampire bar in the Sookie Stackhouse books or better known as the bar in the HBO show True Blood)..so of course, my boys had to match!

Ron as a scary vampire.

Chicken with bat wings and Ron as a vampire (mel sewed the cap to the collar!)           

Tuesday, October 5, 2010

Boo!

I just made this card and I think it is one of my all time favorites!

 I bought these different Halloween flowers awhile ago and could not figure out what to do with them.  (Impulse Michael's buy.)  I added distress ink (vintage photo) to the leaves and around the edges of the petals as well as to the "Boo!" tag and the ribbon (LOVE THAT STUFF!).  The stamp is from my pink stamper.  All of the spiders were cut from the Happy Hauntings cartridge (no clue at what sizes because I forgot to write it down).  All the paper is from Stampin' Up.  I used stickles on the ends of the spiders so it looked like they were hanging from their webbing (or whatever that stuff is called - I should know....right Mel :)

I sure hope I get a bunch more craft stuff for Christmas (hint hint :)

Saturday, October 2, 2010

MPS Halloween Challenge

Here is another card that I made today.  This one is for the My Pink Stamper Halloween Challenge.  You just to make something for Halloween.


I used Tim Holtz distress ink on the Stampin' Up Old Olive and Rich Razzleberry paper.  The two stamps on the edges are also Tim Holtz (I've had them for a few weeks and have been dying to use them).  The sentiment is my pink stamper (ironically the stamp set you can win for submitting a Halloween project).  I also used gold stickles for the cat's eyes and on his bow-tie (again, I need to work on taking better pictures of my cards because they are WAY cuter in person).

Thursday, September 16, 2010

Tim Holtz

After seeing Tim Holtz stuff in the store all the time, I decided to watch some videos to see what his stuff was all about.  Well, I was instantly hooked and had to run out and get some distress inks to try.  I've been looking for a good way to make a Lives of The Monster Dogs scrap book and my normal designs weren't going to be right.  BUT  these distress inks are PERFECT!!!  I can't wait to get some grungeboard, misters, perfect pearls, and all the rest of the stuff he has out. 

This first picture is of a book mark I made for Mel.  I was literally just playing around on a piece of white card stock and liked what I did so much I had to make it into a tag.  This is my first attempt at the grunge look and it took about 15 minutes.  I love that the ink reacts to water - i flicked some water droplets on it to make it look even more worn and vintage.


I was kinda jealous of the one I made for Mel so I had to make one for myself.  I did the ribbon a little different this time too - I found out that if I used white ribbon I could stain it with the inks so it matched.  I also cut the 2 tags out with my cricut, I think I used the sentiments cartridge.


Close up: I used the tissue tape in the center
Hope you like it!  I'll be making more things with Tim Holtz's products in the future, I already have a wish list!!  (Oh, and his scissors are amazing - cut like butter).  He just had a bunch of stuff on HSN but it all sold out before I had a chance to get the great deals...